How To Add Contact Page To Blogger
Adding a contact us form in Blogger is a tedious task as it does not support plugins like WordPress.
What most of the Blogspot bloggers does is to seek the help of third-party sites (foxyform, jotform, 123contactform, etc.).
Blogger Contact Form Page But today, you are going to learn how to add official contact us page in Blogger.
As I said earlier, it is possible to get third-party codes to be inserted in new pages like a walk in the park. Yet, the official contact form is far better than those.
The Benefits of Official Blogger Form
- You will get the message as soon as one sends it. And, the deliverability is 100% as well.
- The simple interface makes it easy for the visitors to contact you.
- If you know Cascade Style Sheet (CSS) language, it will be easy for you to customize the form as per your liking.
- The entire page will not get reloaded for sending the message.
I have divided this tutorial into three sections, adding the contact gadget, hiding it and implementing the official code in a new page.
Part 1: Adding the Contact Gadget
Follow the steps given below to add a contact us gadget on your blog.
Step 1: Visit blogger.com and log in to your account. If you are running multiple blogs, you need to choose the desired blog from the list.
Step 2: Click on Layout from the left sidebar to get an option to add gadgets.

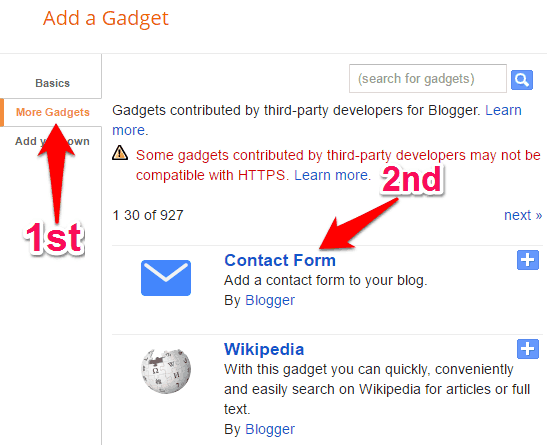
Step 3: You can see an Add a Gadget link on the main panel on the right side. Clicking on it will bring you to a list of gadgets.

Step 4: Then, choose More gadgets from the left side. Now, you will see Contact Form. Just add the same.
Part 2: Hiding the Gadget
Now, you are going to learn how to hide the contact gadget.
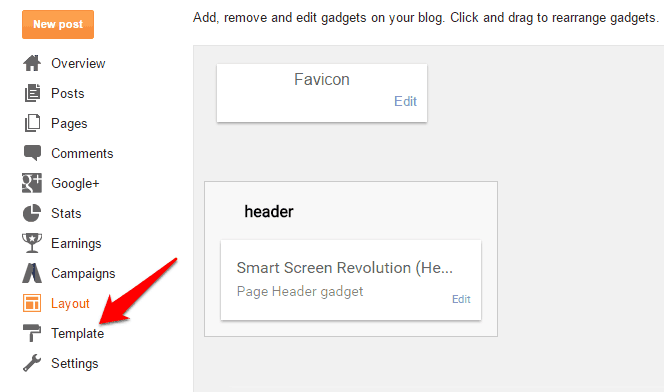
Step 1: We need to play with the template section here. So, click on Templates from the left menu.
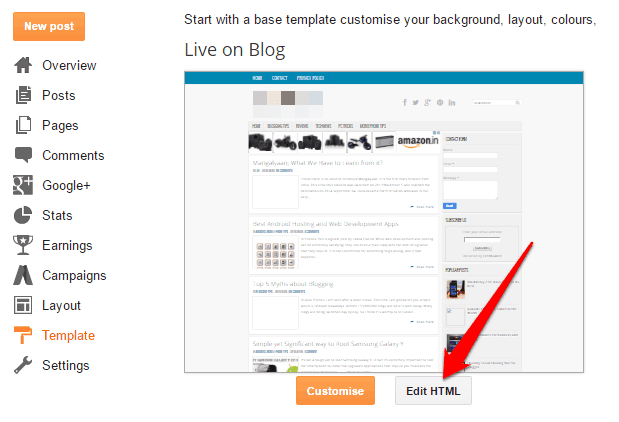
Step 2: Then, click on Edit HTML and you will be provided with the whole code of your blog in a large field.
Step 3: Search for ]]></b:skin> and place the following code just before it.
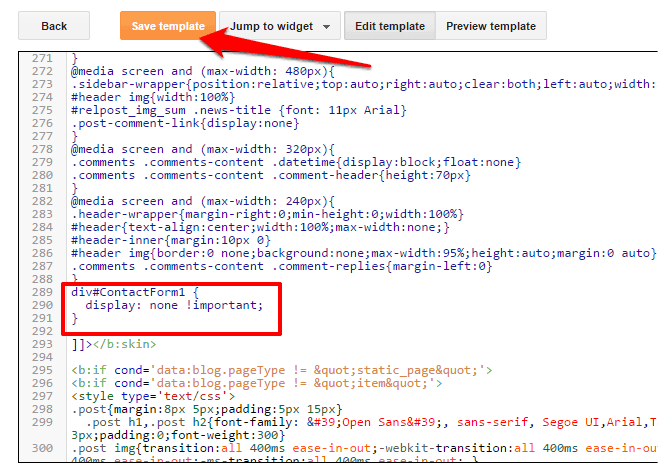
Then, click Save to retain the changes.
After the third step, you will not see Contact widget on your blog.
Part – 3: Adding Contact Form to a Page
You will get the customized official blogger contact form code here to be added to be shown on a separate page.
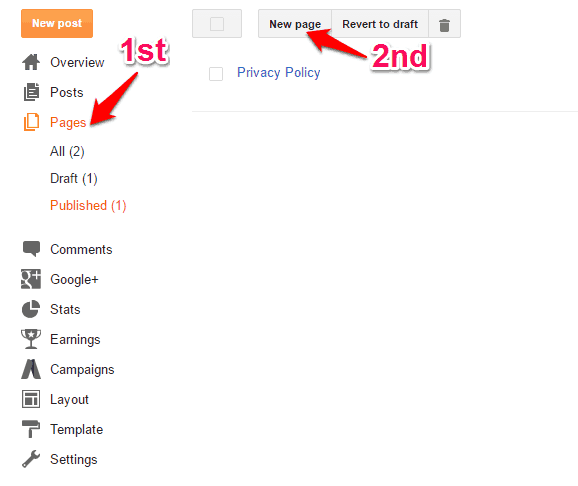
Step 1: Go to Pages and click on New page.
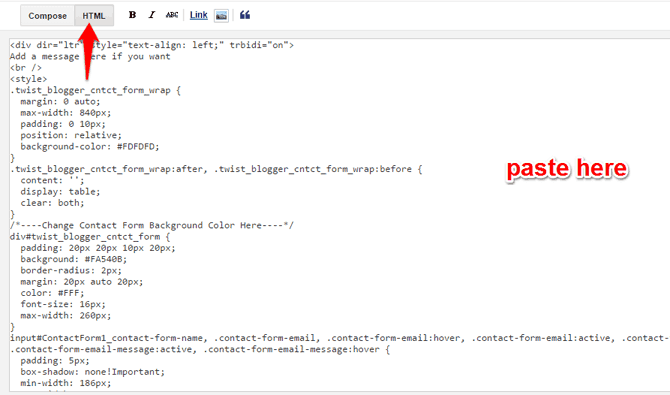
Step 2: Paste the following code into the HTML post editor after removing everything in it.
Step 3: Add a title (like Contact Us) and then change the settings given right as given below.
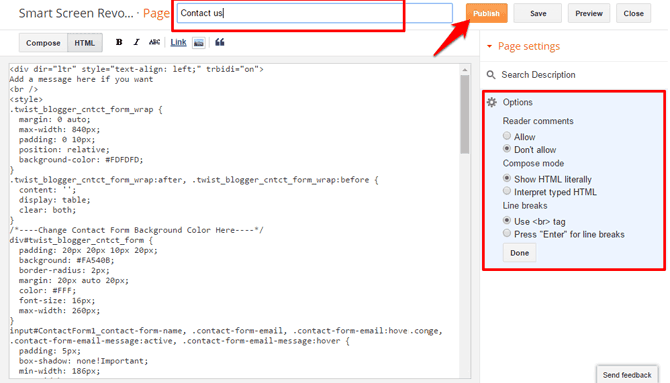
Step 4: Finally, click the Publish button. That’s all.
The messages sent from this contact form will be delivered to the admin email. If the blog has more than one admin, all of them will get it.

1 comment